It’s Unreal.. 2!


Here comes more pictures in-game and what changes we have made. At an early stage Thea our producer was building the levels and boxing out where things ought to be after the concept art I’ve made early on in the project. I’m very happy with the end result and how close it actually is to concept art and plans. Much of this is because of our talented lead art, planning every model and piece needed in each room! Here is the same plan you’ve seen a couple of times now if you’ve followed the blog:

Statue Room.png

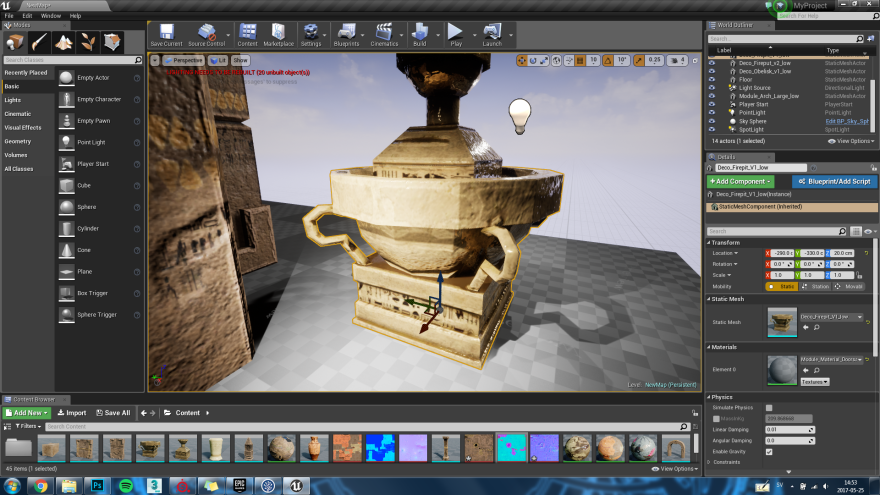
This is a screenshot of the very same room early in the process when Thea was still boxing out the groundwork for the different rooms. After her Amanda and Thea together changed a lot of the floors and walls to make it look less ”boxy” and more interesting. You can also see here in the screenshot that most meshes are still placeholders at this point, except for the big pillars in the middle. These pillars still suffered from the ”wet texture syndrome” however, that all my textures had in the beginning, and that I eventually solved using the fix I explained in the previous blog post.

18720822_10209482213148148_1467039769_o.png

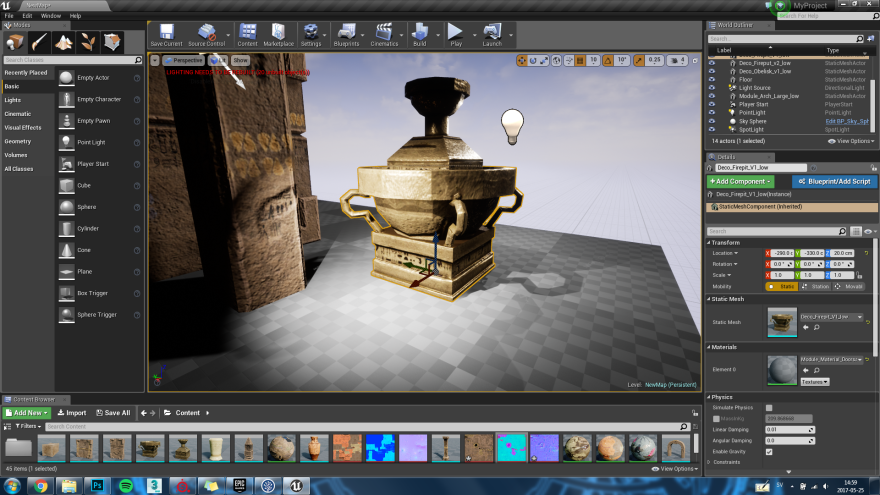
Here it is later in the process after I’ve worked a lot on making the scenes more interesting. Note that it’s still very close to the early concept art. Also no more wet looking pillars! Amanda have also worked a lot on the lighting, illuminating the room.

Halls of statue whole.png

Here is my concept for the two corridors leading down to the statue room. The corridor in the game is almost identical and looks amazing, especially with Amandas’ cool texture on the floor that reflects the lighting in a really cool way.

Corridor.pngHall of statues new.png

I also wanted to show the concept art I made for the Horus Sun in the Horus room, which later also became our logo. The concept arts look and the final products look are very close, which I am very happy with.  I did not have time to make the arms very detailed however, and I’m not super happy with how they ended up. The arms light up with every torch lit in the room. When every torch (and arm) are lit, the puzzle is completed.

Horus SunCopper sun; in game.png

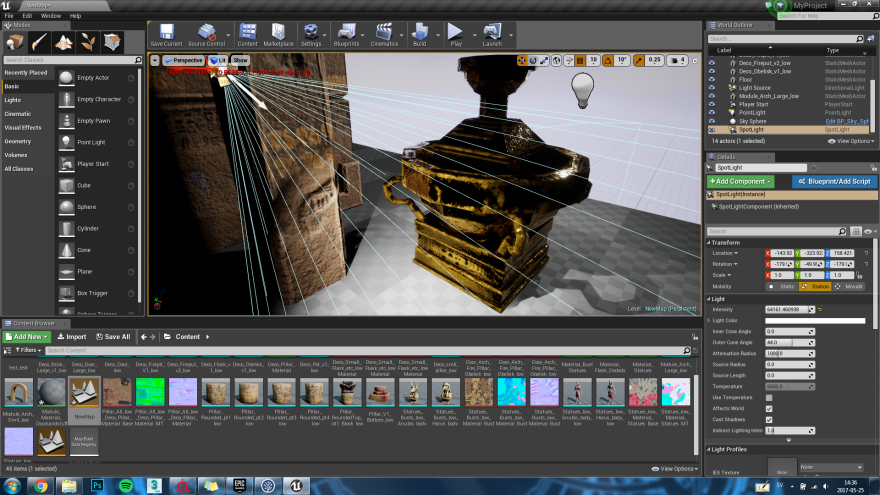
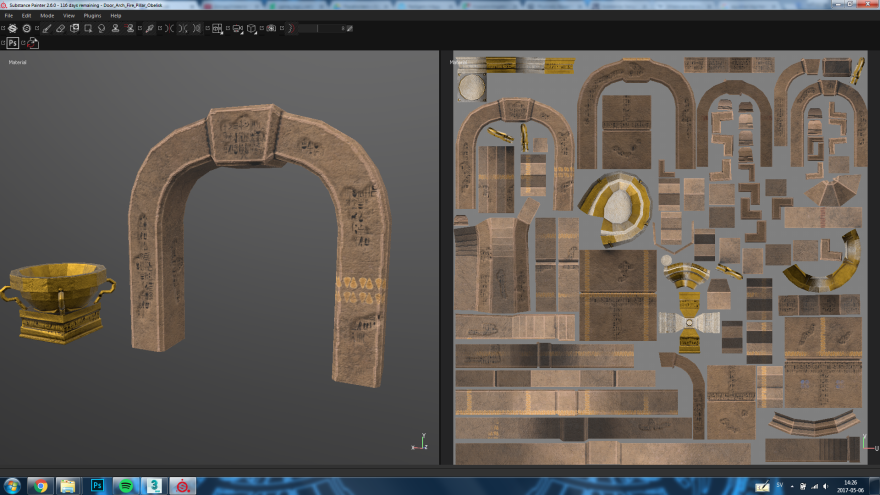
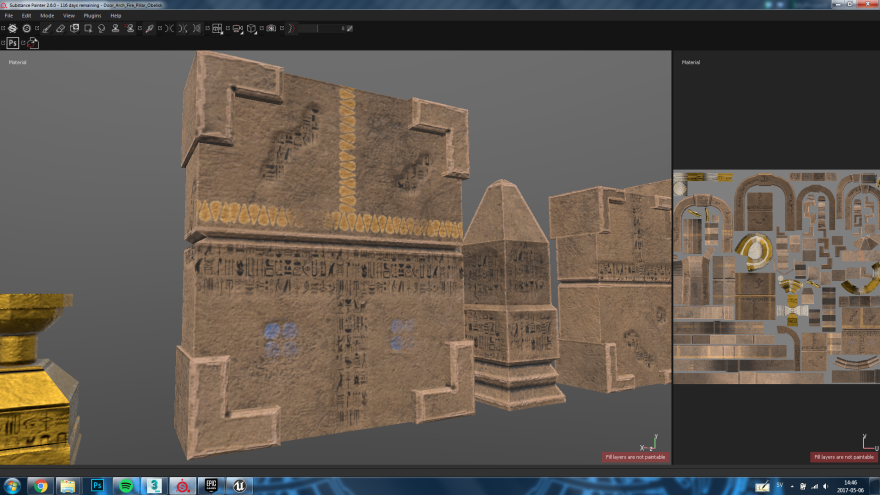
Lastly I have a screenshot of a portion of the Hall of Statues that you can see many of the models I’ve made. Every urn, fire cauldron, pillars, wall decorations (like the little eagle thing behind the fire couldron in the background, the big triangle above it etc), and the obelisk. I have also placed them all in the scene, vertex painted the sand on the floor and tried making the scene look neat.

Halls of statue side.png

That was it for this time, next time I will show more rooms that I have worked on. Until next time!

It’s Unreal!

Hi again!

The last placeholder has been modeled and textured, so my work of replacing things in Unreal has started. Thea has been for quite some time now replacing the placeholder walls and floors, making the different rooms in the correct sizes with the correct meshes. My job now is to polish and populate the world with all the dodads I’ve been creating the last couple of weeks. A problem I’ve had however has been the texture and how it behaves in Unreal. For some reason a lot of my things look ”wet” and very shiny, and some things that look really great in Substance Painter (the program used to create said textures with) have a completely different look in the engine.

At first I simply thought that this had to do with how my levels were lit. In short, an object looks completely different depending on how it’s lit in the world. In Substance Painter while you paint, you can select different backgrounds and lighting to simulate the lighting the object will have in the real game later. I tried lots of different kind of lightings however, and none would work. The object simply looked dark, shiny, but not when the light source was close. something was clearly wrong.

Shiny.png

After talking to Jona, an experienced light artist in Unity and Unreal, he gave us the tip that Unreal liked OpenGL more than DirectX when exporting from Substance Painter. This is an easy option in Project Configuration in Substance Painter, simply selecting one of the two (directX and openGl) to work with in the project.

My objects still looked kind of wet however, and things that were supposed to be shiny and metallic looked more like wet stone. It can be kind of hard to see in the pictures but it was driving me nuts. Here is the version with OpenGL this time. OpenGL, shiny.png

See how it kind of looks wet where the light is halfway illuminating the object and not shiny at all where the light is at its strongest? This bothered me (note that the lighting is unbuilt in the level so these are just to show the changes), and I looked further online.

Turns out Unreal has a little button on each texture you export called sRGB. When looking this up online I discovered that changing your Roughness, Height, Metallic and Ambient map texture to sRGB would create a look not matched in substance painter. Simply unchecking the sRGB check box in the texture solves the problem (only on your Roughness, Height, Metallic and Ambient maps, not your normal or basecolor).

Here it is, not looking wet. It might look like a small difference, but in-game, with the correct lighting, this solve made wonders. Correct version.png

To get to the sRGB button, simply double-click the texture and uncheck this button:gaah.png


Sorry for the overly technical bit, I just hope it might help someone working in Unreal. Until next time!


Getting there!

Hello again!

It’s been a few weeks since my last post, and during this time I’ve been very busy. The programmers have done super well and made a functioning build of our game that we are currently play testing and hope we can send to our loved ones on monday.

Our game is a puzzle game, which means it’s focus group of player’s might not be people playing a lot of games. In can be people quite new to games, so we are going to use our loved ones and relatives to see if the game can be played by someone who isn’t very used to games. The reason for this is the simple reason that we all are gamers. And since we are gamers, we tend making games to other gamers. Gamers and non gamers have very different priorities when playing games. Enemies is an excellent example. People not playing many games want’s to avoid enemies since that is what they would do in real life in most situations: avoid confrontation. Gamers on the other hand would probably seek the enemies out, as a source for experience and new gear. Beyond that enemies can show the path the player should take to move to the next level, since empty paths usually means you’ve already been there.

My job the last few weeks has been to create the last placeholders for our game (placeholders are low quality items, furniture, walls, door etc) and with these populate the game world. Well, I didn’t put the placeholders in the world, that has so far been Thea job, a talented graphic artist in my group. While she’s been placing the placeholders in the world after the sketches and plans I showed in my last post, I started making high-end assets to replace the placeholders with.

Here is an example of a placeholder:

18378767_10154793132913402_940190949_o.png

Here is the end result that is put in the game:

18362709_10154793133818402_1243809958_o.png

This has been a tricky, time-consuming job, but also insanely fun. What I am doing with each set is that I take a few assets that will share the same texture set, put them all into the same 3Ds max file and have them share the same UV map. As you see on the right in the example, that’s the 2D picture of all the texture on the objects in that 3Ds max file. After that I can save each object individually and place in unreal induvidually, but Unreal (the game engine we are working with) will still see that they share the same texture file. As long as I connect the texture set to one of the object in the scene, all the other objects sharing the same texture file will automatically instantly get textured.

What’s even better is that in Unreal (the actual game) you can simply select the placeholders that Thea has placed and replace them all with a new mesh, the textured high-end meshes I’ve made! This makes it easy to keep rooms and design exactly as they are, as long as the sizes and pivot points are exactly the same.

A lot of the things we place in the scene have no texture to start with. Some things like walls and similar we paint texture on in the engine (Unreal; in the game). These Kevin and Amanda in my group have more insight in, since I texture and model the meshes who do not use this method.

As a last thing, I can show you a door I’ve made concept art, placeholder, high-end mesh, and texture on! From scratch to finish so to speak! 😀

Concept art:
Door_conceptart.png

Low poly mesh:

18362587_10154793173053402_777473595_o.png

End product:

18362251_10154793170238402_633774535_o.png
Until next time!